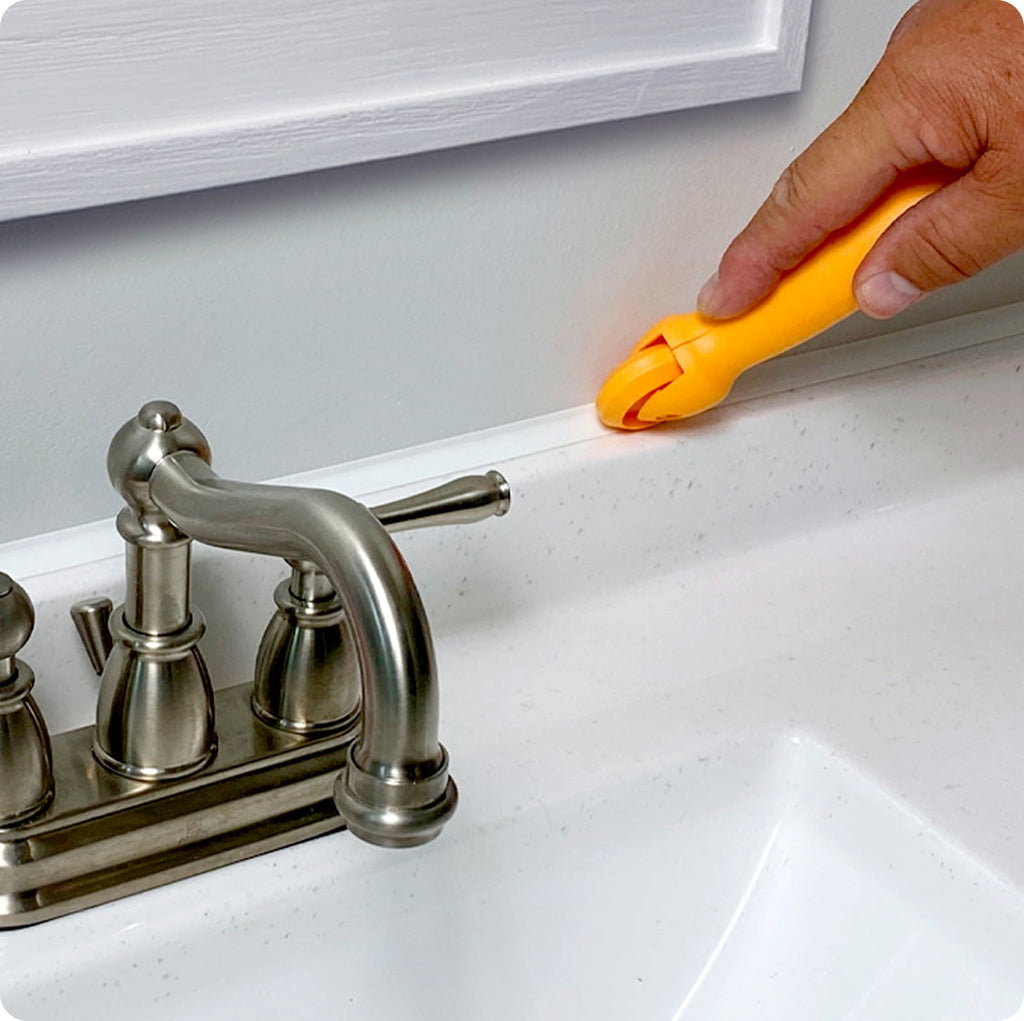


Flexible Trim Applicator Tool
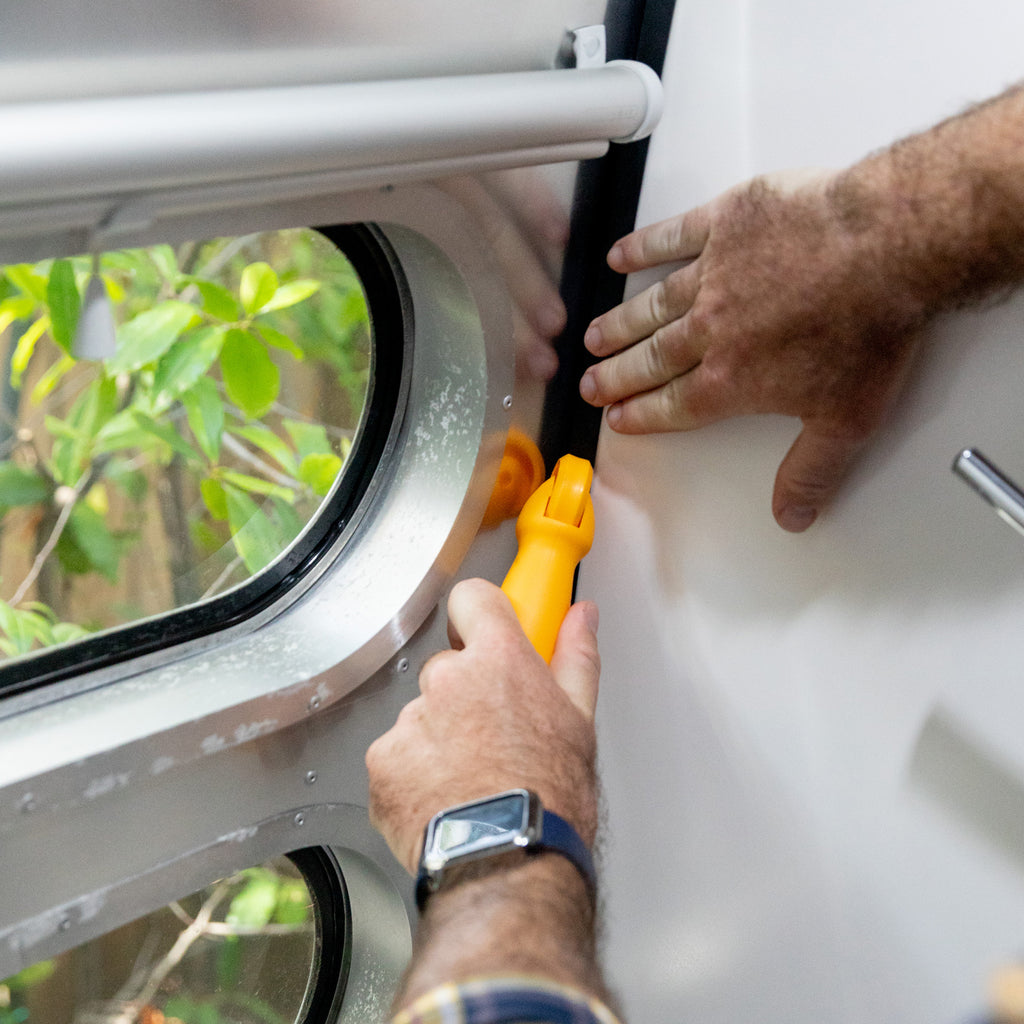
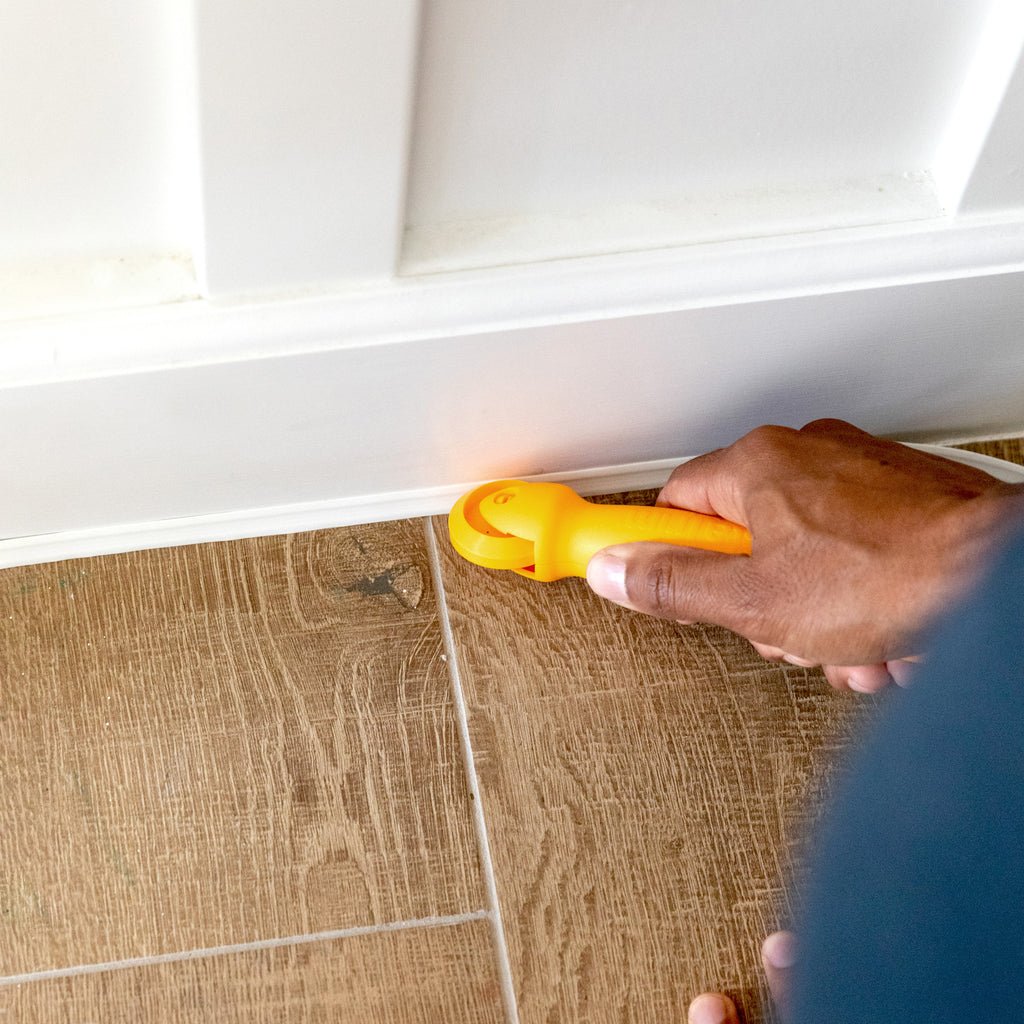
The InstaTrim Applicator Tool ensures a strong bond between InstaTrim and the surface where you install it. InstaTrim includes pressure-sensitive adhesive that forms into the irregularities on areas it is installed. In order for InstaTrim to adhere properly, once it is set in place, you must firmly press the strip into place. Our applicator tool helps you apply enough even pressure along the entire strip to ensure adhesion and to make InstaTrim last for years.
- EASY APPLICATION - The InstaTrim applicator for installing self-adhesive corner molding, or peel and stick trim saves time and ensures a smooth, even finish.
- NO MESS - Don't waste another afternoon on a frustrating DIY project. Simply prep your surface, peel back the liner, position the trim, and press it down with the applicator tool.
- GREAT FOR BEGINNERS - The applicator tool helps you apply the right amount of pressure, providing quick, consistent results. Feel confident that you will see great results with the convenient application tool. For use on both 1/2" and 3/4" in wide InstaTrim.
- HIGH QUALITY RESULTS - At InstaTrim, quality is everything. When installed with the applicator tool, InstaTrim caulk strips firmly adhere to the surface, creating durable, long-lasting results.
- MADE IN THE USA - Experience the quality of American manufacturing and see the difference it can make in your home. Our family-owned business appreciates our loyal customers and works hard to make sure they are always satisfied with our products.
APPLICATION
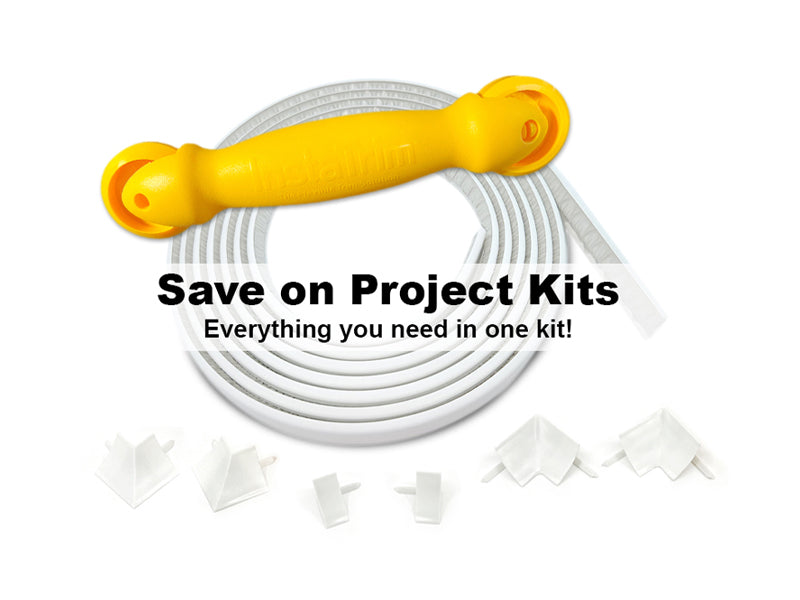
Our flexible trim strips feature a pressure sensitive adhesive. When applied with firm, constant pressure, InstaTrim flexible trim will last for years without requiring replacement. For the best adhesion and professional look, we recommend the InstaTrim Applicator Tool and the InstaTrim Corner & End Caps
ADHESIVE
Rubber-based butyl, pressure sensitive adhesive, contains no toxic chemicals or fumes. Conforms to ASTM D4236 (Info Tox International, Inc.)
PATENTED DESIGN
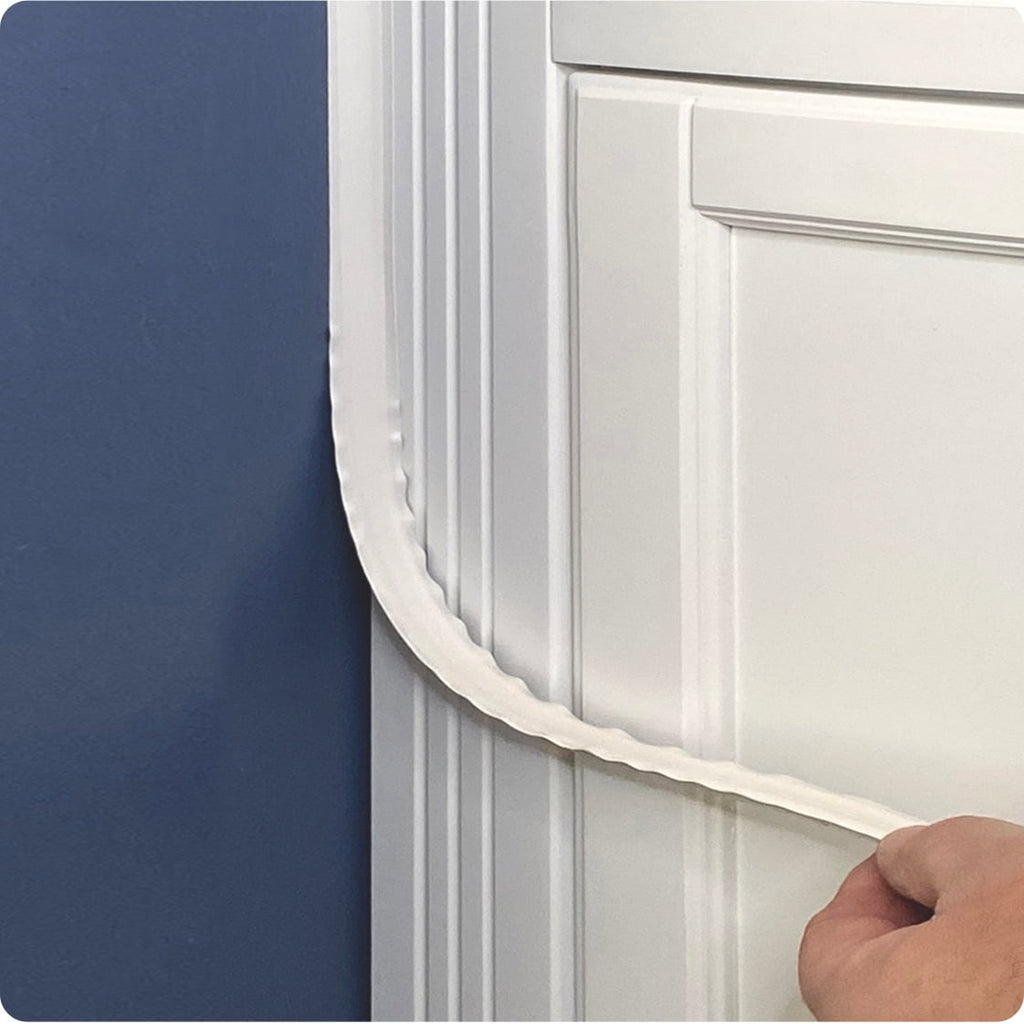
InstaTrim’s flexible wings create an additional level of protection against dust, dirt, moisture and air movement. Our flexible wings apply pressure to the application surface creating a second barrier of protection.
CEILING APPLICATIONS
We recommend using 1/2 inch wide strips.
SILICONE REMOVAL
If you are applying InstaTrim to an area that has old silicone caulk, you will need to complete the Silicone Removal Process.
Using a sharp blade, cut away and remove all existing silicone caulk.
Use a scrubby sponge or stiff bristle brush to help remove stubborn silicone residue with acetone or isopropyl alcohol.
Thoroughly wipe surface with acetone* to remove any remaining residue or oils left on the surface. Let surface dry completely.
*Only use Acetone in well-ventilated areas and avoid any exposure to ignition sources such as a pilot light, candle or cigarette.
INSTALLATION
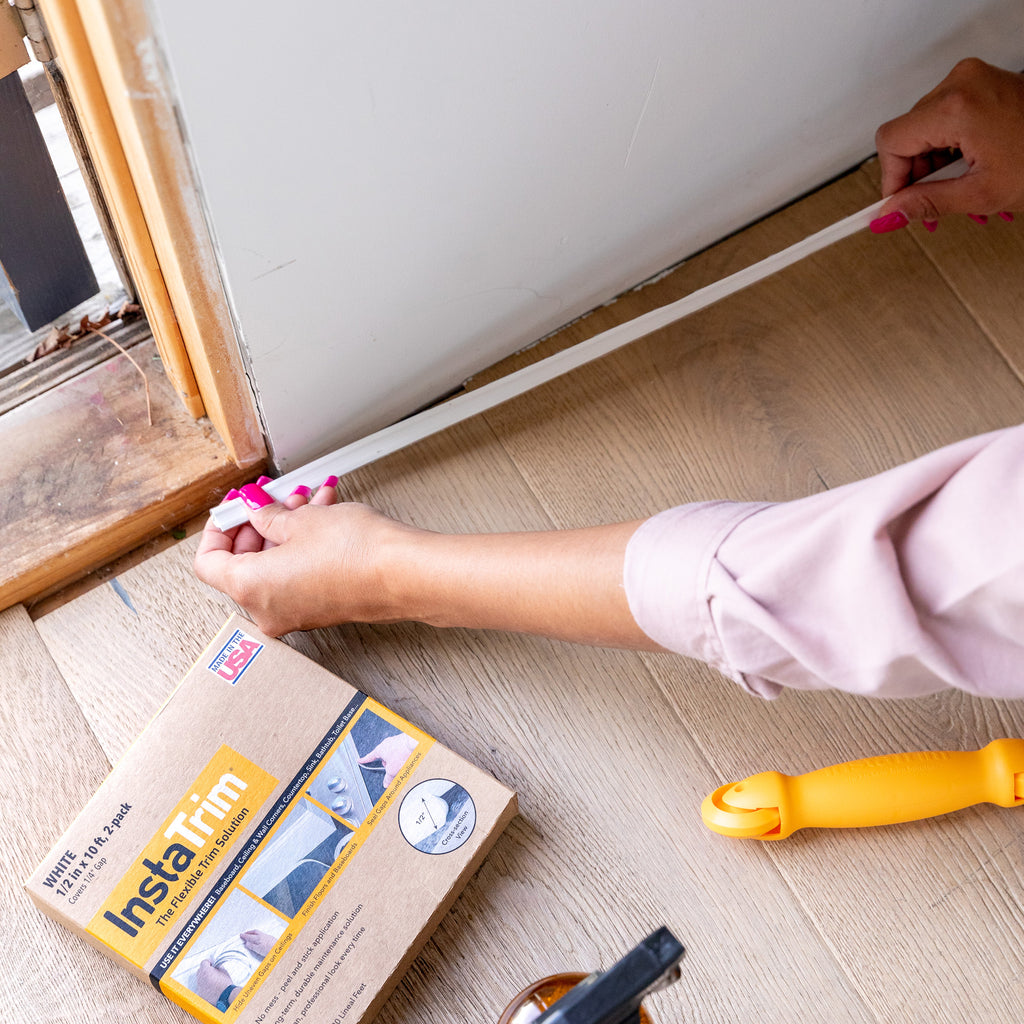
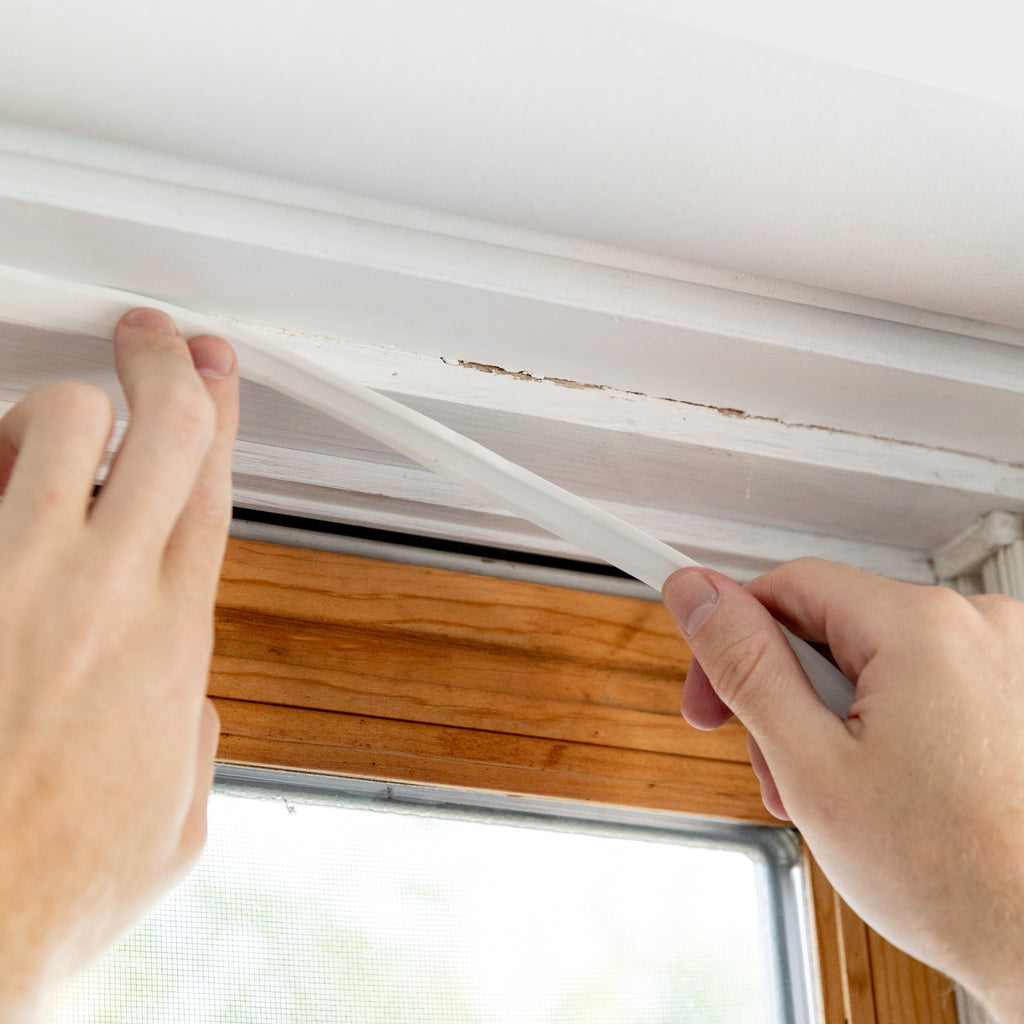
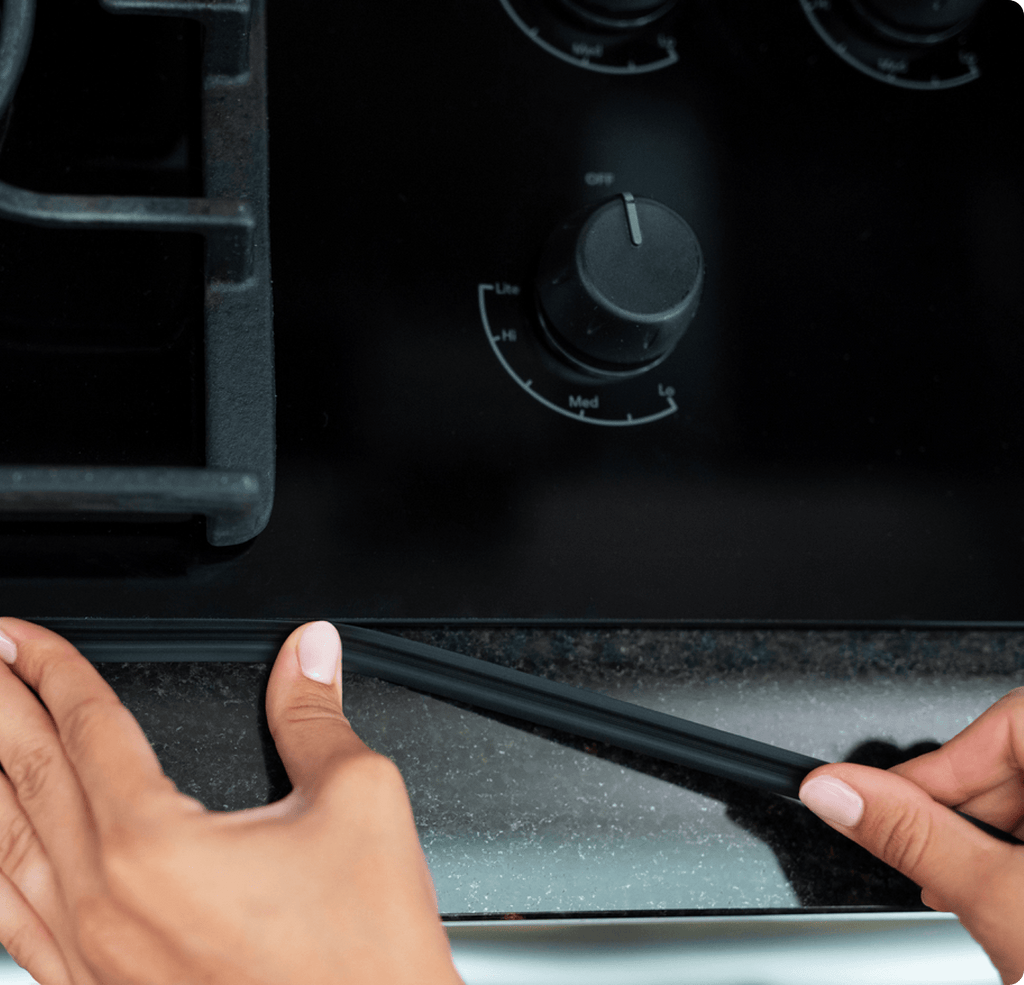
Position the end of the strip at your starting point and lay the strip where it will be installed to determine where to cut the finish end. Be sure to add ¼ inch to the end to ensure a tight fit. Mark the strip and cut with a razor blade or scissors.
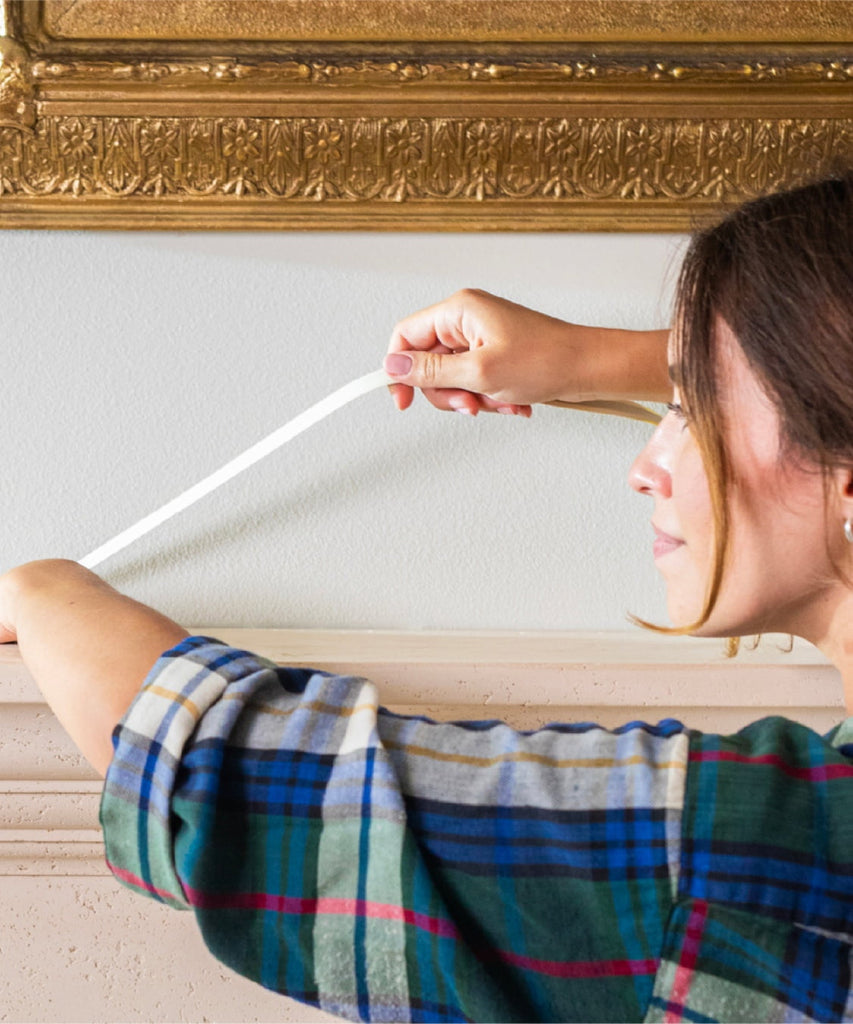
On the adhesive side of the trim, peel back the liner to expose the adhesive. Hold the end of the strip with the adhesive side facing the application corner. Push the first end of the strip onto the corner and apply the first 2-3 feet by pressing it down every 4-6 inches with your fingers. Repeat with the next 2-3 feet until you reach the end. If the strip is a little crooked, peel the strip back and reset it before the next step.
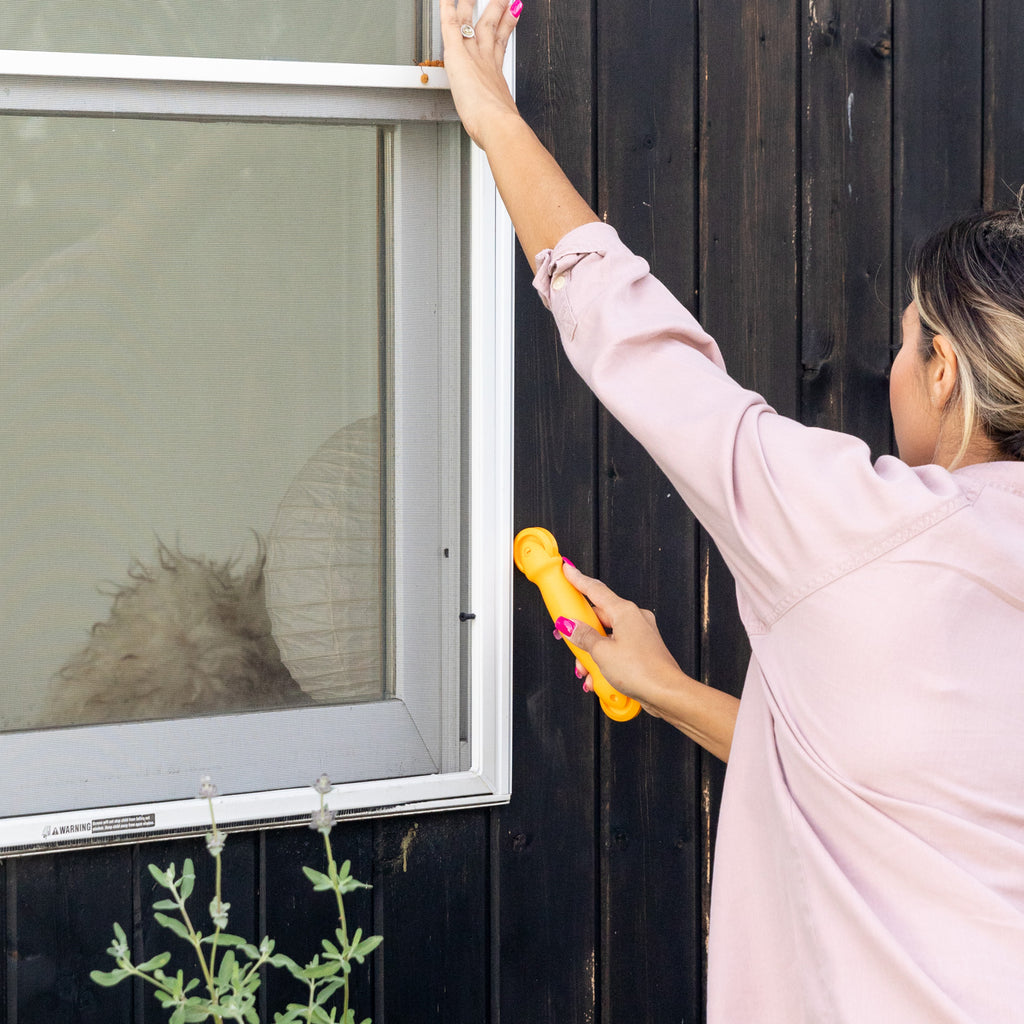
Next, firmly press the strip into the corner along the entire length, making sure you are applying enough pressure to allow the adhesive to bond with your application surface. We recommend using the InstaTrim Applicator Tool which helps to provide even constant pressure for the adhesive and also makes it easier on your fingers.
No drying time is needed. If you wish you may paint immediately after installing.
NOTE: Do not stretch the InstaTrim strip as you install it, this may cause the end to pull back once the trim has been set into place.
SURFACE PREPARATION –
To ensure an effective installation for InstaTrim’s adhesive to properly bond with the surface it is very important that the consumer follow all instructions for cleaning the application surface.
SILICONE –
InstaTrim will not adhere to old silicone! All silicone caulk, residue and oils MUST be 100% removed prior to installing InstaTrim strips. See “Silicone Removal Process” for details on how to properly remove all silicone. NOTE: some tile, granite and quartz products come with a silicone sealer to prevent moisture and stains from absorbing into the surface.
WAX AND OILS -
Surface must be free from wax and oils. Do not use surface cleaners that contain waxes and oils, such as furniture polish, mineral spirits and surface restore products.
Application surface must be clean, dry and free of dust and dirt.
HOW TO APPLY
1 Clean surface and let dry.
2 Peel back the liner.
3 Press firmly into the gap.
4 Trim the finished edge, and voila!
USE INSTATRIM ANYWHERE
InstaTrim works with all surfaces that do not have silicone or silicone residue on them, like: Granite, Laminate, Wood, Glass, Metal, and more!